

Let’s say, you are making a cloud and/or sharing service. It would be disappointing to find out after putting in all of that work to make the app, you can’t have your users download an image from your website. At least it was for me, so if this very specific problem has occurred for you too, this article will explain how to make images download onto the user’s computer instead of doing this.
But can’t I just send the user to the file URL, wouldn't that download it for them, you ask?
Nope, probably. If this was any other kind of file, then most likely. We are talking about browsers here, so I can’t talk in absolutes. It’s difficult to assume a general behavior between all browsers as they can behave different from each other.
Okay, then what is probably the solution to this, you add?
This:
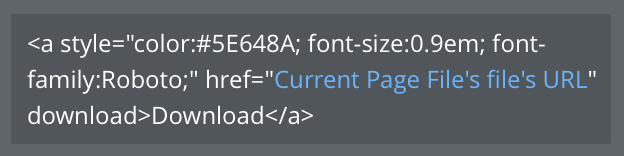
The addition of ‘download’ to the end of the href tag makes all of the difference, but then again, browsers, so I don’t know.
Just make an HTML element in Bubble and type this code in. You can change up the color hex, font-size, font-family, etc. Make it entirely how you want it to look. You can learn more about how to CSS in this Introduction to CSS.
Hacking Bubble is a series on how to make Bubble do things it probably wasn’t meant to do.
Don’t miss out on the latest Bubble content by signing up here.
Was this article useful? Do you have a better or different approach? Let me know!


