

This is a walkthrough of some part of my process for creating NotRealTwitter (which I’ll call NRT), a Twitter clone that I made a few months ago in order to illustrate the power of Bubble. You can see the Bubble Editor view of NRT by going here.
It would take a long time to go through the entire process step-by-step, so instead I will go over a few important components, especially the database structure. Note that if I were building the app now, I would do some things differently, both because I’ve gotten better at Bubble and because more features like custom states have been released.
Application structure
The first thing I did before starting to build is I figured out how I wanted my app to be structured. I took a look at Twitter and saw that I needed 4 pages to copy most of its functionality:
1) Index page — this is the page that the user who isn’t logged in will land on. It will have a way to log in and register.
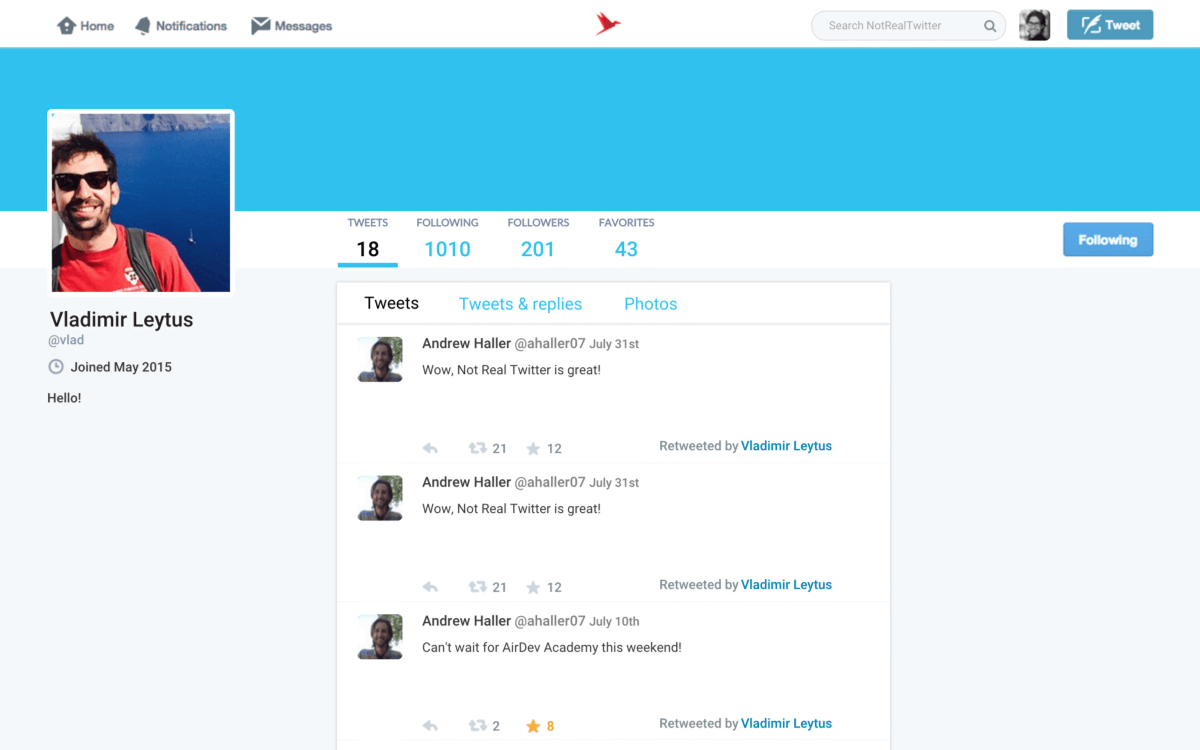
2) Home page — this is the logged-in user’s home page that shows current tweets, my stats, etc.
3) Profile page — this is the profile page for any user that shows their tweets, other users they follow, etc.
4) Notifications page — this page shows a notification when someone follows me, mentions me, or favorites/retweets my tweets
Data Structure
The next task was figuring out how the database will be structured, as pictured in the Data Tab of the Editor. This is a bit dryer, but you’ll have to think this way as soon as you’ll starting building an app. It’s becoming more visual later, as I go through the process of creating a tweet, etc.
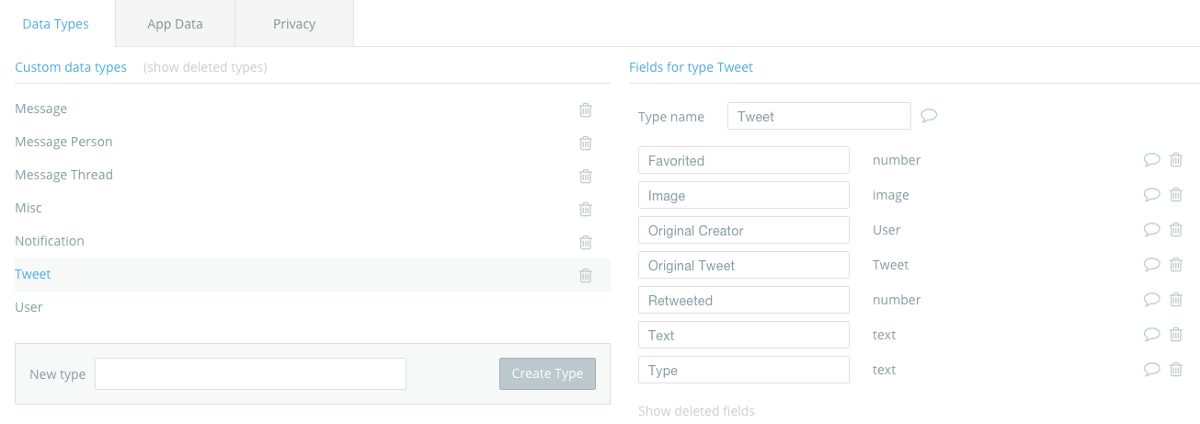
You can see below the different types I created for NRT in the Bubble editor and the fields for the Tweet type. In this case, a Tweet is described by a Text (the actual tweet), a type (retweet, etc.), a creator, an image, etc.
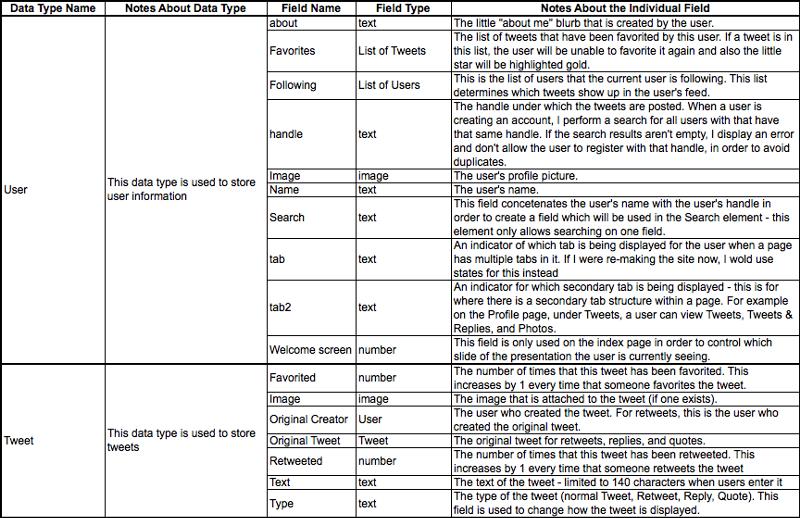
Below is an outline that shows the list of data types that I used as well as the reasoning behind every field in the data type. While you may not want to go through each cell, you can see how I have been thinking about each type/field. The fundamental question being, how do I describe a given concept? What are the relationships between two things (for instance, a user and who he follows, etc.).

Tips for UI elements
Here is for the data part. Then I had to think about a few things regarding the page elements. Here are a couple of general notes that may be useful as I went through that process.
- For button images and hover effects, one option was to use conditional formatting and change background color, borders, etc. when the button is hovered. However, in order to get the buttons as close to the original as possible, I shamelessly took screenshots of the original Twitter buttons both in normal and hovered states and set the Conditional Formatting to change the source image to the hovered image when it was hovered. Not necessarily the prettiest, but closer to the original ;)
- There are instances where I needed to change what the page displayed at different times. For example, on the Profile page, sometimes I wanted to show the user’s tweets and sometimes I wanted to show their followers, as it is in Twitter. One way to build that would be to have a separate page for each of the options and navigate to that page when the option is selected. However, that’s not ideal because it makes the page feel less dynamic. Instead, I created multiple groups and made them invisible at first. Then I created a field for each user called “tab” that I would set to different values based on various user actions. Then I set each invisible group to be visible when the “tab” is set to a certain value. This method is slightly outdated because you can now use custom states to accomplish the same thing. The way you’d do it is by creating a custom state on the page called for instance ‘mode’, and then you show/hide groups based on the value of that state, and you change the value of this stage in a workflow.
Workflows
Now I’m going to go through a couple of processes in detail.
Process for creating a tweet
Here are the components that are used:
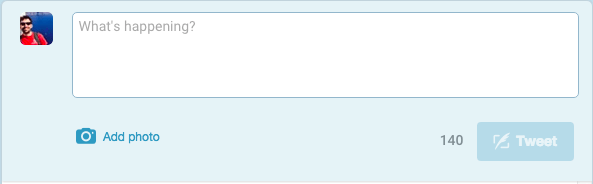
- A multi-line input for writing the tweet
- An Picture Uploader
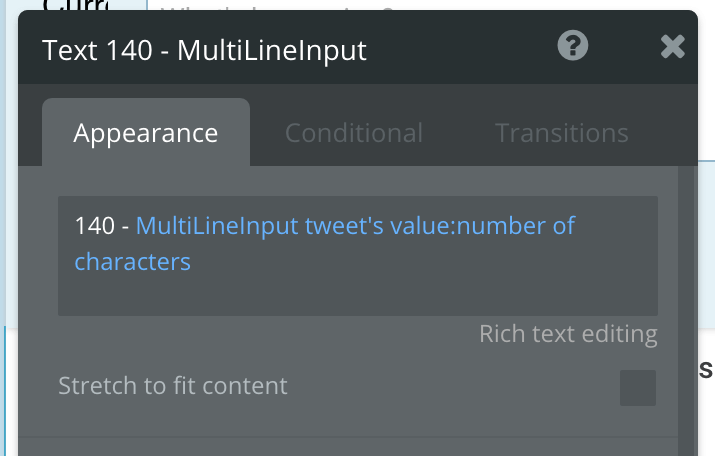
- A counter which shows how many characters are left. This counter takes the number of characters currently in the box and subtracts it from 140. You can see how Bubble lets you define such a dynamic content visually.
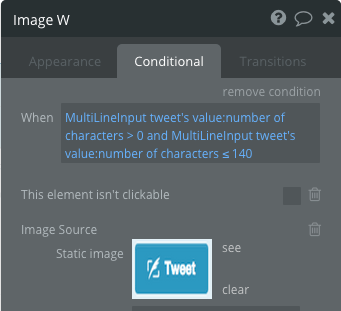
4. The Tweet button which creates the tweet. This button is greyed out by default and becomes active when the character count is between 1 and 140, as shown by the logic below. As you can see, the source images actually changes here. I built that expression piece-by-piece with the dropdowns, without typing anything! It basically says: “when the input has at least one character, but less than 140, change the image”.
Now let’s talk about actually creating the Tweet. This is done through a workflow, since it’s triggered by a user action. When he clicks on the button Tweet, we create a new tweet. More precisely, the following actions are performed when the Tweet button is clicked.

- The first action is Create a New Thing of type Tweet with the following properties (you’ll recognize the fields defined above)
- Image is set to be whatever the user uploaded (this will be ignored if the user doesn’t upload an image)
- Original Creator is set to the user who is currently logged in
- Text is set to whatever is typed into the MultiLine Input
- Type is set to “Tweet” (for a retweet, it’d be different)
- Favorited is set to zero
- Retweeted is set to zero
Here’s what that looks like:

2. The second action is Reset Relevant Inputs — all that action does is clear any inputs used in the current workflow, in this case the multi-line input used to write the tweet as well as the image upload input. This is a UX aspect, so that people don’t create twice the same tweet.
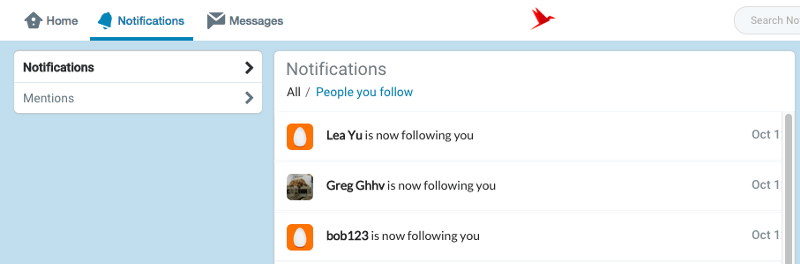
Process for creating a notification
One of the features of NRT (just like Twitter) is that a user gets notified when certain things happen — when someone follows them, when their tweet gets favorited/retweeted, etc. See below for an illustration of this:
Here’s how it works. Let’s take the action of pushing the “Follow” button for a user and look at its workflow:

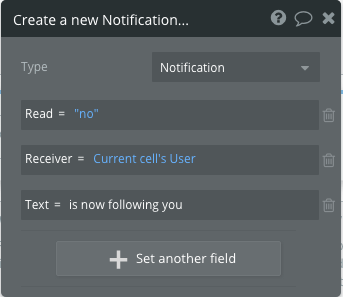
The first step of this workflow is what’s actually creating a notification (the second step adds the user that just got followed on to the list of users that the current user is following). The first step sets the following fields:
- Read is set to no — this will be set to yes once the user views the notification
- Receiver is set to the user who is being followed, in this case the user who is in the current Repeating Group cell
- Text is set to “is now following you” — when the notification is displayed this text is added to the name of the user performing the action
Here’s what that action looks like. Here again, you can see the fields that I defined above.
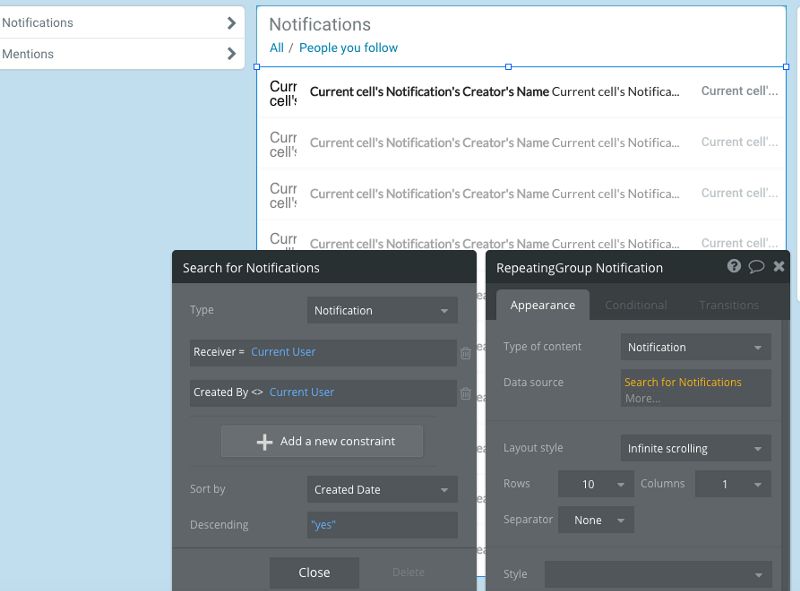
Once the notification is created, it has to be displayed on the user that got followed Notification tab. Here’s the list of notifications (using a repeating group in Bubble) that displays it. All that it does is searches for notifications where the Receiver is the current user (but not the ones created by the current user).
In addition, I’m displaying the number of unread notifications (and messages) in the blue bubbles in the top bar:

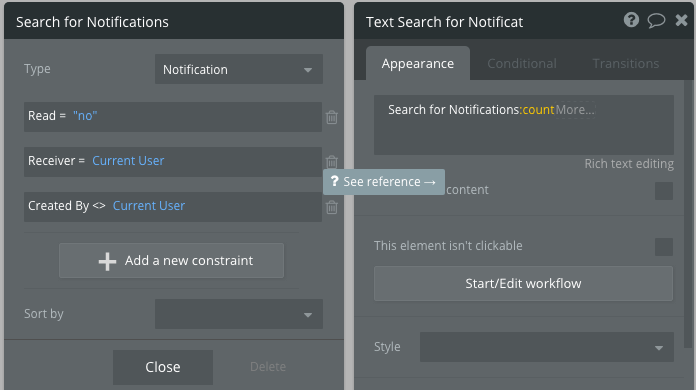
Here’s the search that I’m doing in the blue bubble to show the number of unread notifications:
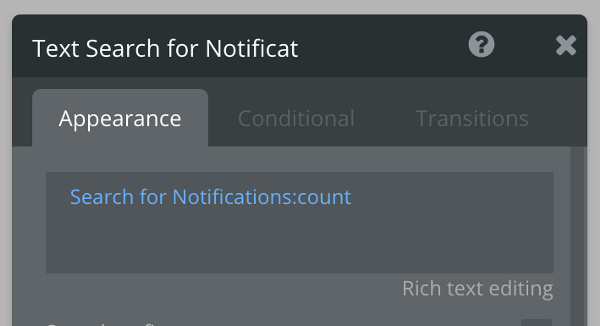
I just need to take the count of entries in that search to display the number of notifications.
Finally, when the Notifications page loads, I perform several actions, including setting all of the unread notifications to be marked as read:
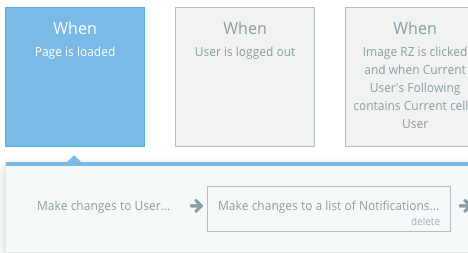
These are the details of the “Make changes to a list of Notifications” action. I’m searching for all Notifications marked as not read and intended for the current user and then changing them to be marked as read.

That’s it for now! Hopefully this helps someone build their own app. And in the meantime, feel free to check out our Bubble development shop, AirDev.


